How to Analyze a Film Scene: A Step-by-Step Method
A practical method for taking a scene apart: three viewings, a shot map, and a set of questions about framing, light, cutting, sound and blocking that turn a vague impression into an argument you can defend.
Most of us "analyze" films the way we describe dreams: a mood, a few images, a feeling that something worked. That is a fine place to start and a poor place to stop. Scene analysis is the craft of turning that impression into observations someone else can check, and then into a claim about why the scene affects an audience the way it does. Directors do it to learn from other directors. Editors do it to steal rhythm. Students do it because a paper is due. The method is the same.
What follows is a working procedure, not a theory. It fits on one page, takes about two hours for a three-minute scene, and gets faster with practice.
Step 0: Pick a scene with a job to do
Choose something between ninety seconds and five minutes with a clear beginning and end: a character enters or leaves, a location changes, a question is raised or answered. A scene that has to accomplish something (introduce a villain, turn an alliance, deliver bad news) gives you a yardstick. You can ask, at every level, "how does this choice serve that job?"
Avoid the famous set pieces on your first attempts. The shower scene from Psycho has been written about so thoroughly that you will end up rehearsing other people's readings. Pick the scene before or after it instead.
Step 1: Watch it three times, each time for one thing
The single most useful habit is to separate viewings by channel.
- First pass, story. Sound on, no notes. Afterwards write two sentences: what happens, and what changes between the first frame and the last. If nothing changes, you have picked a transition, not a scene.
- Second pass, image. Sound off. Now you notice what the dialogue was hiding: where the camera sits, how often it moves, how much of the frame is dark, who is placed higher or closer to the lens.
- Third pass, sound. Eyes closed, or the screen turned away. Listen for the layers: dialogue, ambience, effects, music, silence. Note where sound arrives before the cut and where it lingers after.
Three passes feel slow. They are faster than one confused pass followed by three more to check what you missed.
Step 2: Build a shot map
A shot map is a table with one row per shot. Keep the columns few: shot number, duration in seconds, shot size (wide, medium, close-up), angle (eye level, high, low), camera movement (static, pan, tilt, track, handheld), and a five-word description of the content. A three-minute dialogue scene usually has twenty to forty rows; an action scene can run past a hundred.
Two numbers fall out of the map immediately. Average shot length tells you the scene's pulse. The proportion of close-ups tells you how much the scene is about faces rather than space. Then look for the shape: does shot length shrink toward the end (classical acceleration into a climax), or does the scene open and close on long takes with a burst of quick cuts in the middle?
Mark the shots that break pattern. If a scene has been cutting every four seconds and one shot holds for twenty, that shot is where the filmmaker wants your attention.
Step 3: Read the frame
For each key shot from the map, ask four questions.
- Where is the weight? Faces, light, and movement pull the eye. Is the subject centered, pushed to an edge, or trapped in the lower third under a heavy ceiling of set?
- What are the lines doing? Horizontals calm. Diagonals unsettle. Verticals divide and confine (doorways, bars, window frames). Count how many times a character is framed inside a frame.
- How deep is the space? Deep focus lets foreground and background comment on each other. Shallow focus isolates. A rack focus is a small edit inside the shot: note what it moves you from and to.
- Where does the light come from, and how hard is it? A single hard key from the side carves a face into halves. Soft frontal light flattens and forgives. Backlight separates a figure from the background or turns it into a silhouette.
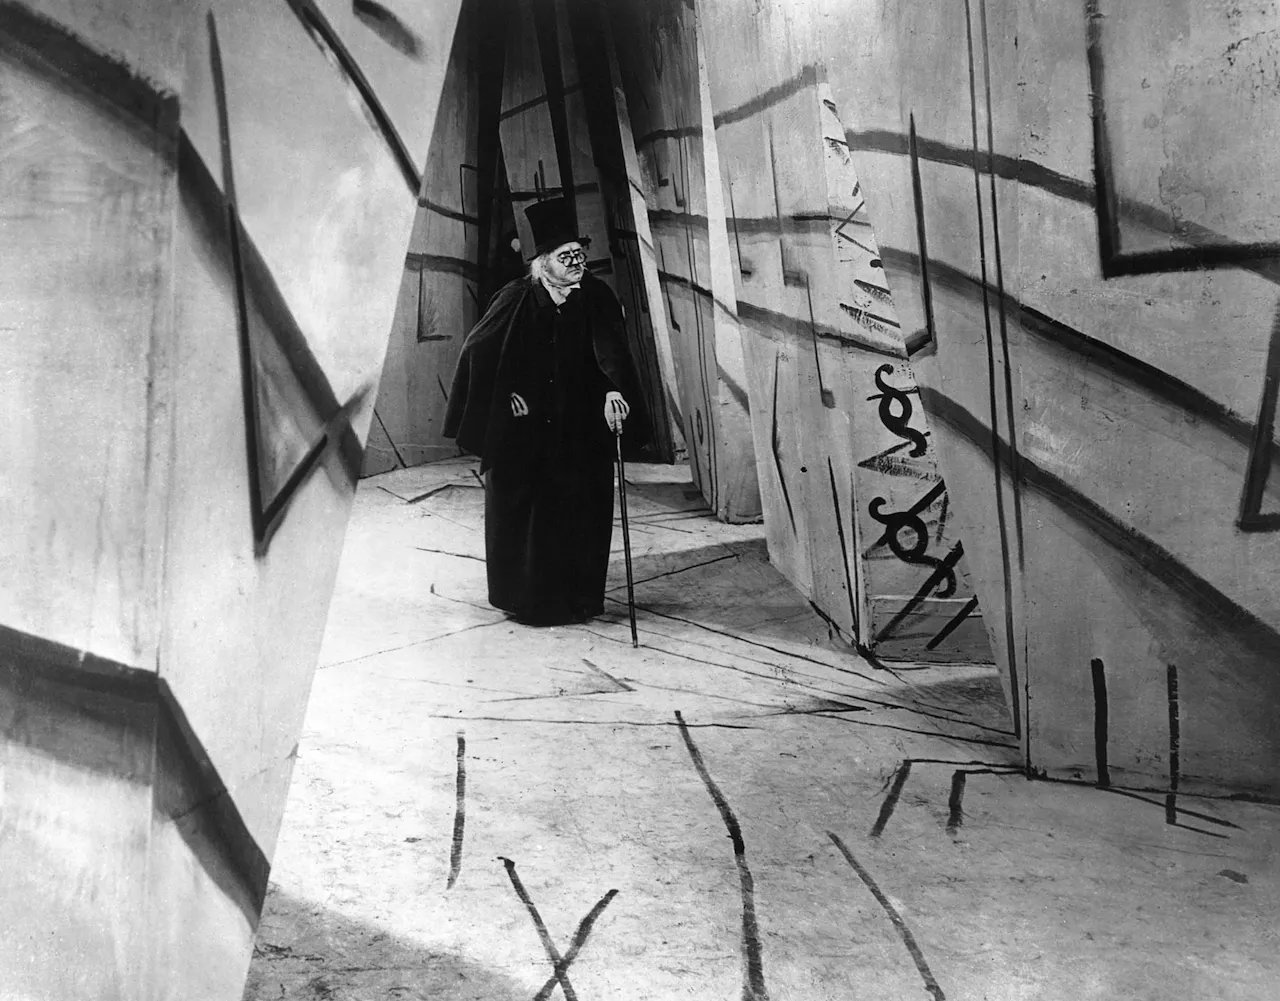
The Cabinet of Dr. Caligari (1920) is the extreme case, and a useful one because nothing about its frame is accidental. The designers Hermann Warm, Walter Reimann and Walter Röhrig painted shadows and highlights directly onto the flats, tilted every wall and window, and let streets converge at angles no builder would allow. When Conrad Veidt's somnambulist Cesare creeps along a wall, the wall itself is a diagonal, and the "shadow" beside him is paint that never moves. The frame tells you the world is bent before any character says so. Once you have seen composition carry meaning this openly, you start noticing the quieter versions everywhere: a slightly low camera on a character about to take control, a doorway framing the person who is about to be shut out.
Step 4: Read the cut
Editing is easier to feel than to describe, so anchor it in your shot map. For each cut, ask what motivated it: a glance (we cut to what the character sees), a line (we cut to whoever answers), an action (we cut on movement to hide the join), or nothing at all (a hard cut that wants to be noticed).
Then look at continuity. Do eyelines match? Does the scene respect a consistent axis between the characters, or does it deliberately jump the line to disorient? Is there a master shot the scene keeps returning to, and if so, when does it stop returning?
Finally, note where sound and image cut at different moments. A line that begins over the previous shot ("J-cut") ties two spaces together. A line that continues after we have cut away ("L-cut") lets us watch a listener react. Editors use these constantly; the audience never notices, which is the point.
Step 5: Read the sound
From your third viewing you should have a rough layer list. Now ask what each layer is for. Is the ambience realistic or thinned out to focus attention? Does the music tell you how to feel, or does it sit against the image (a cheerful tune over something terrible)? Where is the scene's loudest moment, and where is its quietest?
Silence is a choice like any other. A scene that drops all sound for two seconds before a cut is using the same trick as the twenty-second shot in Step 2: a break in pattern that says look here.
Step 6: Read the bodies
Blocking (where actors stand and move) is the most under-analyzed layer, because it is the hardest to see when dialogue is running. Track distance: who approaches whom, who retreats, who stays planted. Track levels: who sits, who stands, who ends up lower than they began. Track props and business: hands doing something while the mouth says something else.
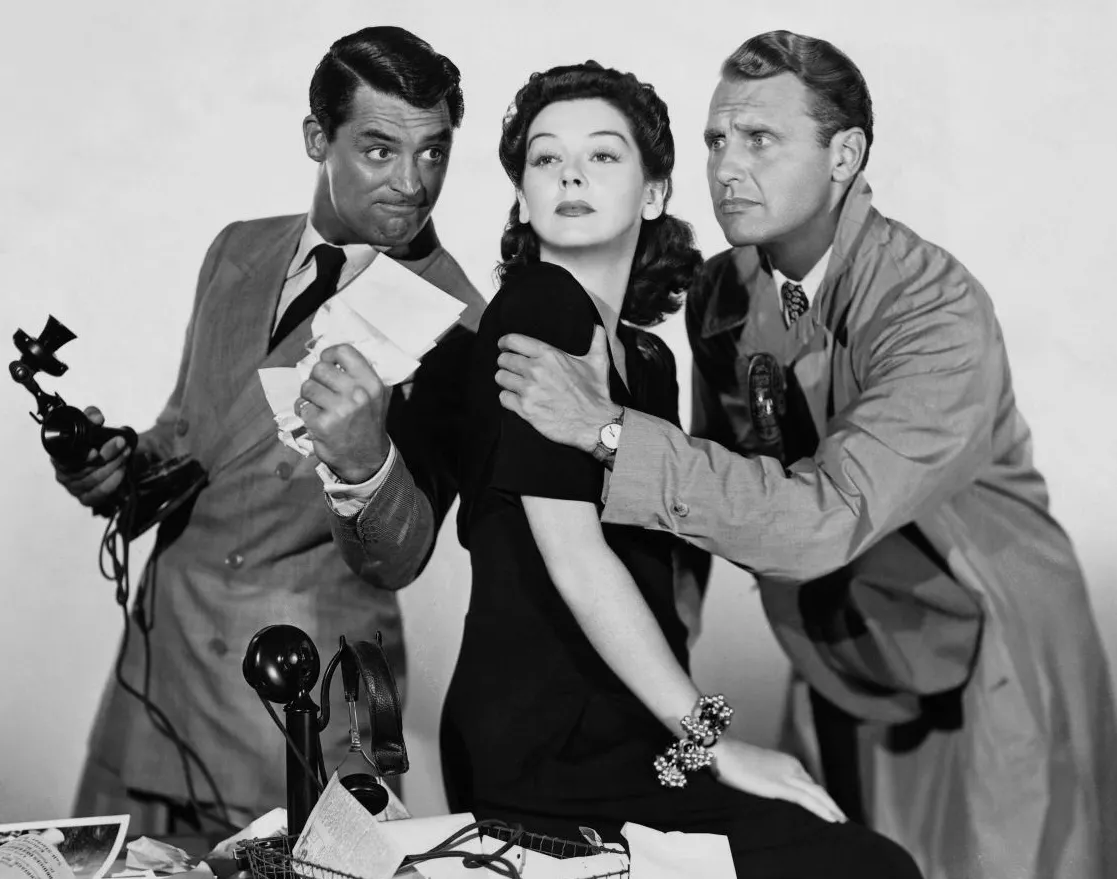
Howard Hawks's His Girl Friday (1940) is the classic training film here, for the opposite reason from Caligari: the visuals look plain, so all the design is in the bodies and the talk. Hawks had Cary Grant and Rosalind Russell overlap their lines and speak at a clip far above ordinary conversation, then shot long takes in which the camera does little and the actors do everything. Map who interrupts whom and who wins the physical space (the desk, the telephone, the doorway) and you have mapped the power in the scene without a single line of dialogue.
Step 7: Put it in context
Only now bring in what you know from outside the scene. Where does it sit in the film's structure? What did the scene before set up, and what does the scene after pay off? What did the same filmmaker do in a comparable scene in another film? What was the production able to afford, and what constraints (a single location, a short schedule, a censor) might explain a choice you were about to credit to genius?
Context comes last for a reason. If you start with it, you see what you expect to see. If you finish with it, you get to test your observations against it.
Step 8: Write it up as an argument
A good analysis has three moves: a claim ("the scene makes us complicit in the character's cruelty"), evidence ("it does this by holding a close-up of her face for eleven seconds while the cruelty happens off screen, and by placing the camera at his eye level"), and a consequence ("so when the film later asks us to judge him, we are also judging ourselves"). Every observation from steps 2 to 6 either supports the claim or gets cut.
Resist the urge to include everything you found. The shot map is your notes, not your essay. Two or three well-chosen observations, tied to timestamps so a reader can verify them, beat twenty loose ones.
A checklist you can keep
- What is the scene's job, and what changes from first frame to last?
- Average shot length, share of close-ups, and where the pattern breaks.
- Composition: weight, lines, depth, light direction and quality.
- Cuts: what motivates them, continuity, sound/image offsets.
- Sound layers, loudest and quietest moments, use of silence.
- Blocking: distance, level, business, who controls the space.
- Context, brought in last.
- One claim, two or three pieces of evidence, one consequence.
Do this ten times and you will not need the list. You will also never watch a film the same way again, which is the price of admission.